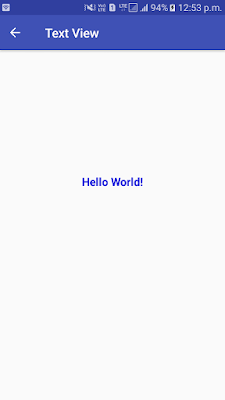
TextView - Example in Android Studio (Simple Hello World) :
1. activity_main.xml
Android studio auto generates code for activity_main.xml file. You may edit this file according to your requirement.
"1.0"
xmlns:app="http://schemas.android.com/apk/res-auto"
xmlns:tools="http://schemas.android.com/tools"
android:layout_width="match_parent"
android:layout_height="match_parent"
tools:context=".MainActivity">
android:layout_height="wrap_content"
android:text="Hello Android!"
app:layout_constraintBottom_toBottomOf="parent"
app:layout_constraintLeft_toLeftOf="parent"
app:layout_constraintRight_toRightOf="parent"
app:layout_constraintTop_toTopOf="parent" />
2. MainActivity.java
The main activity code is a Java file MainActivity.java. This is the actual application file which ultimately gets converted to a Dalvik executable and runs your application.
package com.example.helloworld;
import android.support.v7.app.AppCompatActivity;
import android.os.Bundle;
public class MainActivity extends AppCompatActivity {
@Override
protected void onCreate(Bundle savedInstanceState) {
super.onCreate(savedInstanceState);
setContentView(R.layout.activity_main);
}
}
3. Manifest.xml
Whatever component you develop as a part of your application, you must declare all its components in a manifest.xml which resides at the root of the application project directory. This file works as an interface between Android OS and your application, so if you do not declare your component in this file, then it will not be considered by the OS. For example, a default manifest file will look like as following file :
package="com.example.hp.myapplication">
android:allowBackup="true"
android:icon="@mipmap/ic_launcher"
android:label="@string/app_name"
android:supportsRtl="true"
android:theme="@style/AppTheme">
package="com.example.hp.myapplication">
android:allowBackup="true"
android:icon="@mipmap/ic_launcher"
android:label="@string/app_name"
android:supportsRtl="true"
android:theme="@style/AppTheme">
Run the android application :
To run the android application, click the run icon on the toolbar or simply press Shift + F10.
The android emulator might take 2 or 3 minutes to boot. So please have patience. After booting the emulator, the android studio installs the application and launches the activity. You will see something like this:
 |


No comments